
Basics - Chat Link Settings
After successfully creating a chat link, you can configure different agent assignment strategies for different link channels, toggle bot settings, and customize the chat window.
Choosing Different Link Types:
In the "Chat Link" settings, you will see 2 types of links. You can choose based on your needs.
1.Global Accelerated Link (VIP Exclusive Link): A ready-to-share chat link for connecting with customers across regions. No custom domain setup is required. Availability depends on the visitor’s network; test the link with your audience before sharing it.
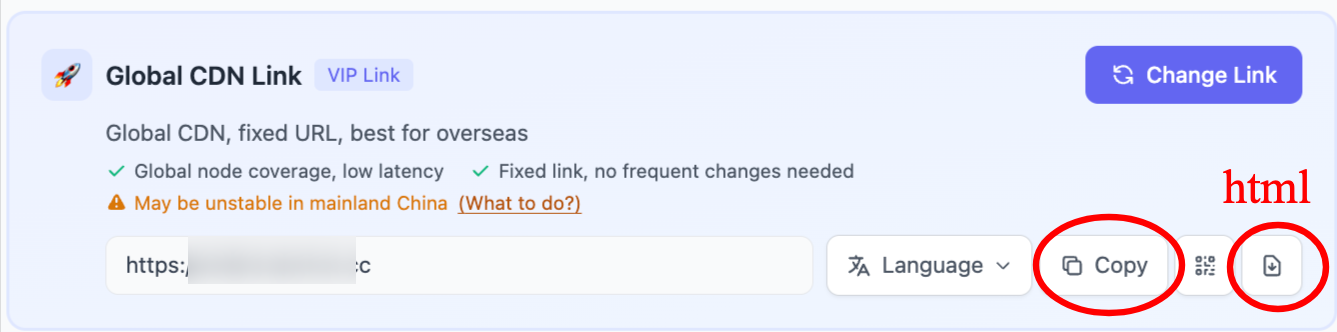
- You can also click "Change Link" in the upper right corner to generate a new link. You can configure it yourself in case the current link gets blocked.
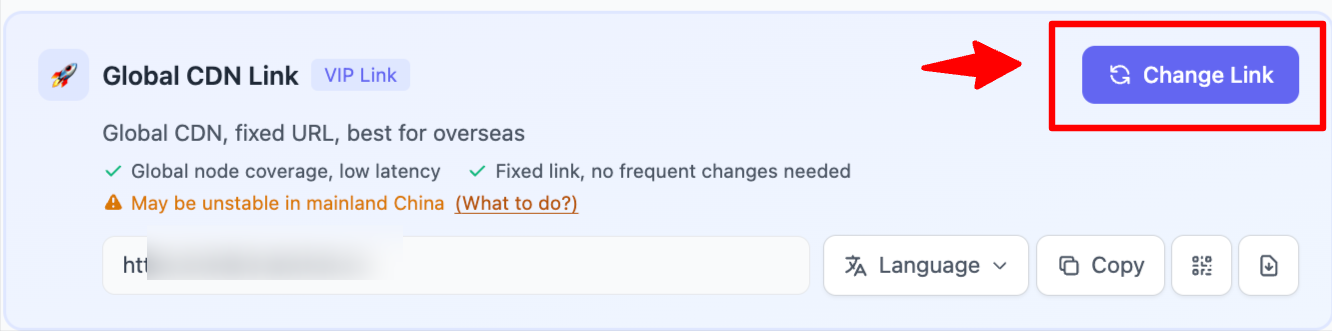
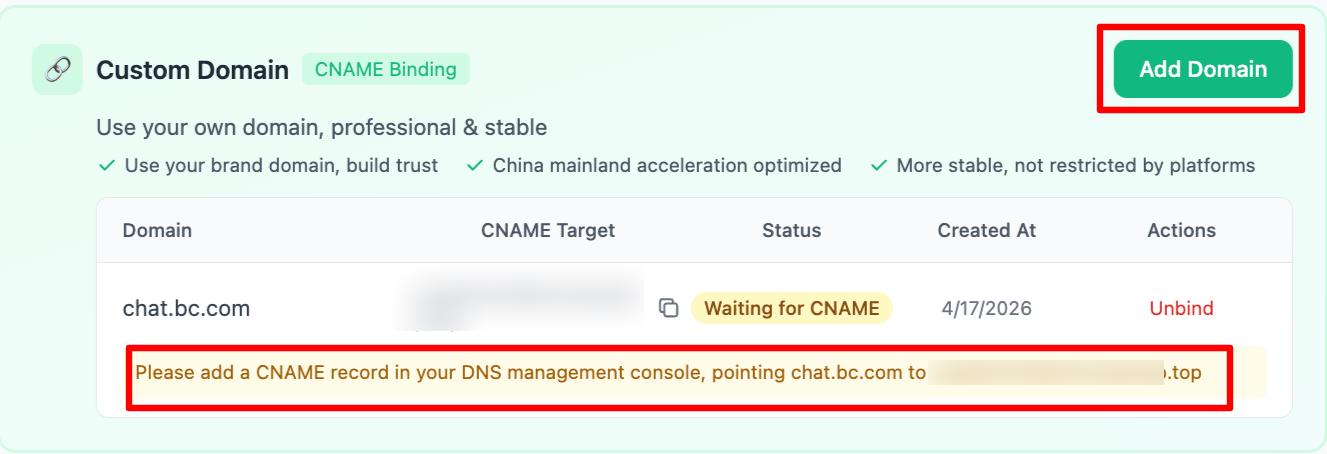
2.Custom Domain (via CNAME Binding): Use your own domain for chat links to give customers a consistent, branded address.
Simply select "Add Domain", then follow the instructions to configure CNAME in your DNS management console. After DNS takes effect (usually a few minutes to tens of minutes, depending on the provider), return to this page and refresh to verify whether the binding was successful. Recommended for customers who have a technical team and value brand image.
Note: It is recommended to use a subdomain under your primary domain here, to avoid occupying or affecting your primary domain due to the binding.
Chat Link Agent Assignment Strategy:
On the "Settings - Chat Link" page, scroll down and you will see many configuration options for the chat link.
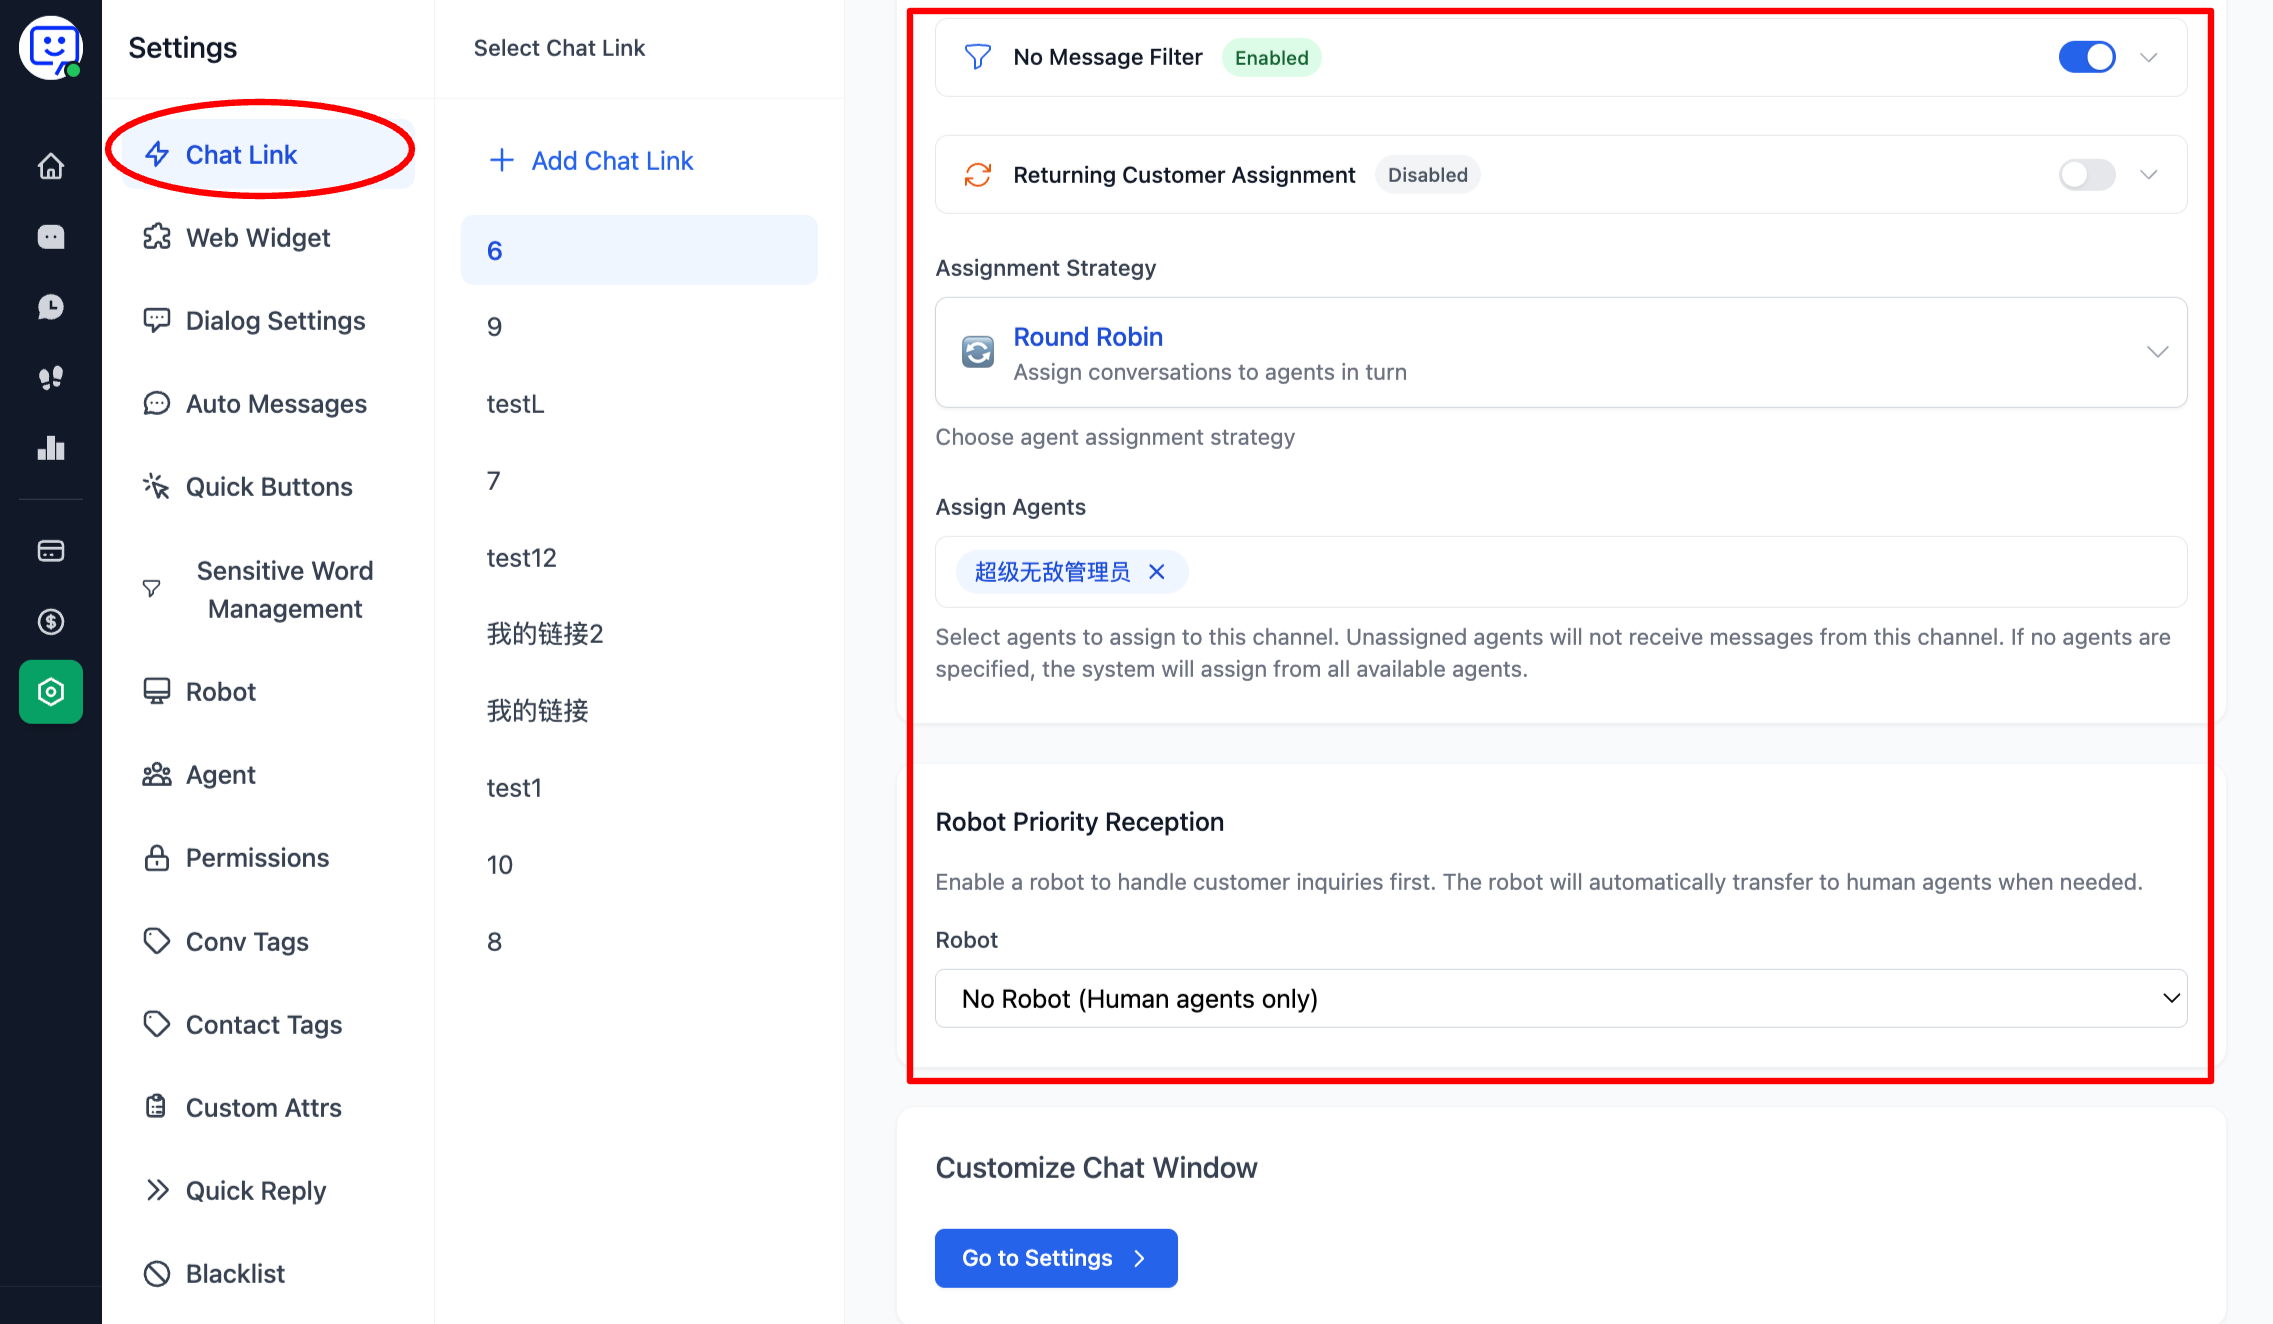
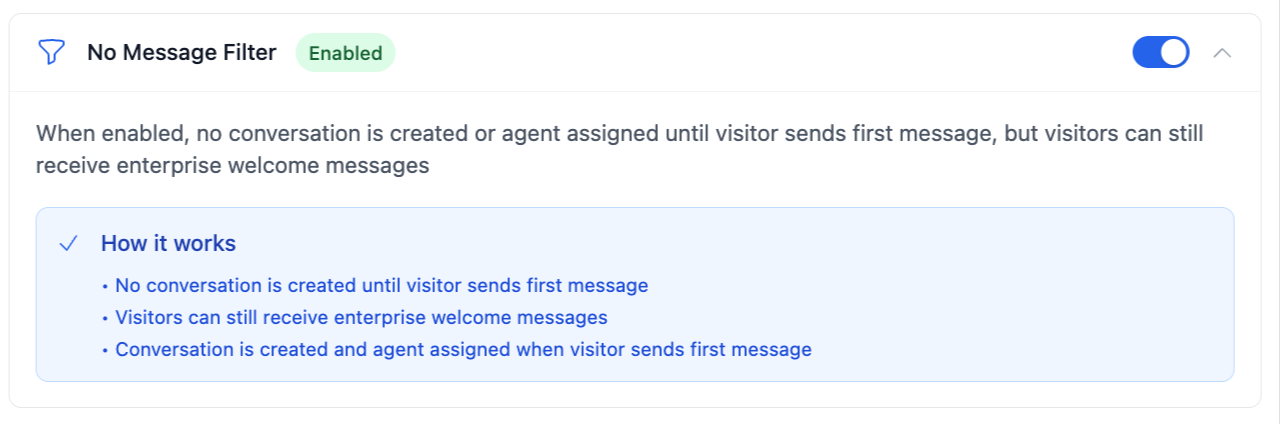
1.No-Message Filtering (suitable for high-traffic scenarios): When this feature is enabled, if a visitor enters a conversation without sending a message, the conversation will not be assigned to an agent and will go to "Pending Assignment", improving agent efficiency. However, visitors can still receive the company welcome message, enhancing their experience.
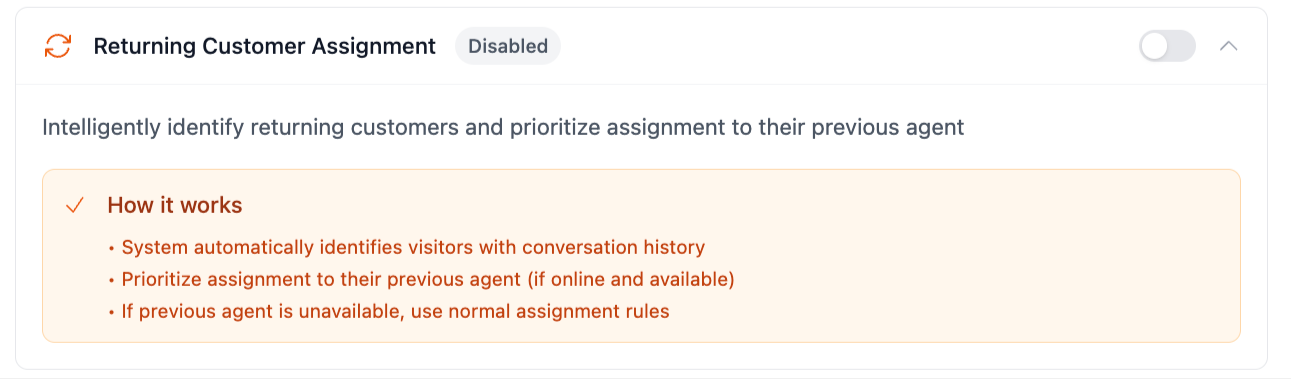
2.Returning Visitor Assignment: When this feature is enabled, conversations will be preferentially assigned to the agent who last served the visitor. This helps agents understand the visitor's history, improving service efficiency.
3.Agent Assignment Strategy:
- Click the expand button to select the appropriate strategy and flexibly manage agent workload.
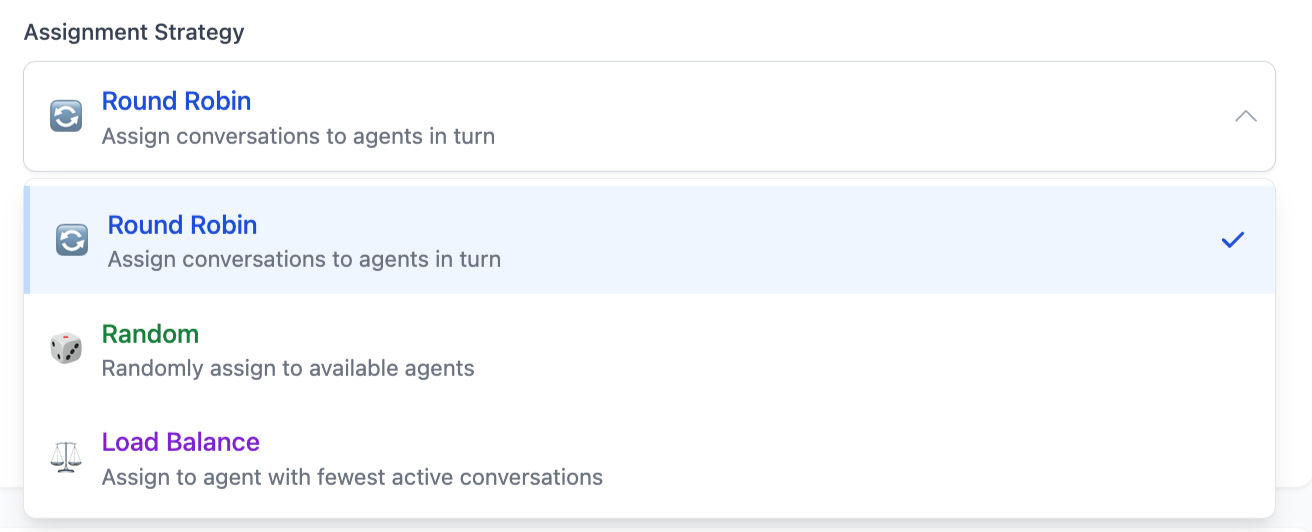
-Round Robin: Ensures balanced workload among agents.
-Random Assignment: Simple, but less balanced.
-Load Balancing: Prioritizes agents with fewer current conversations, suitable for larger teams.
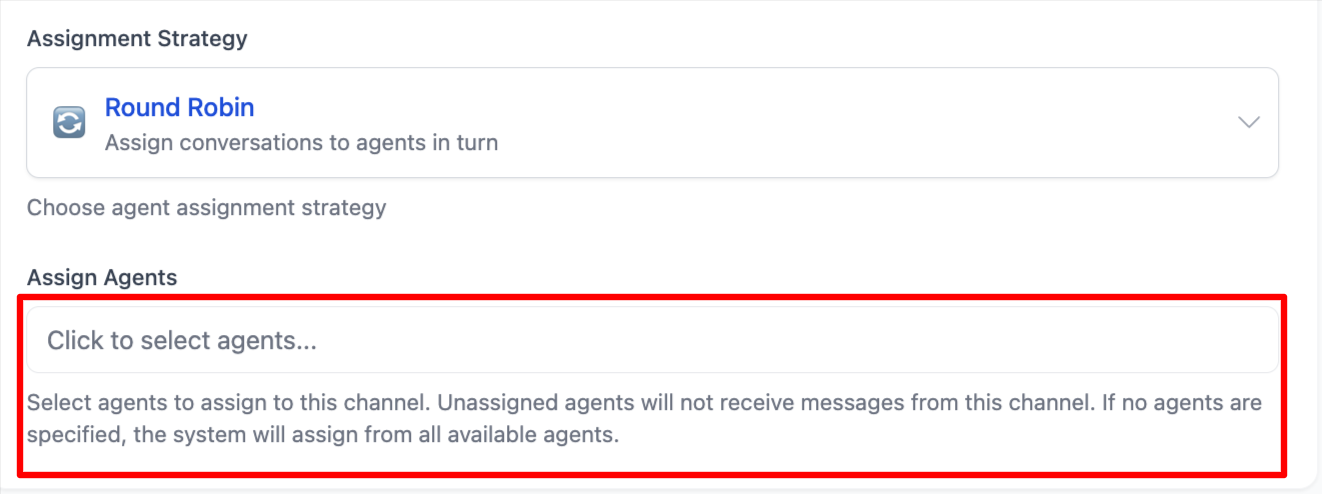
- Additionally, you can assign dedicated agents for this channel. If this channel is dedicated to "App", you can assign agents who are proficient in "App" business to serve visitors from this channel, improving service efficiency. Once configured, agents from other channels will not receive messages from this channel, avoiding message confusion.
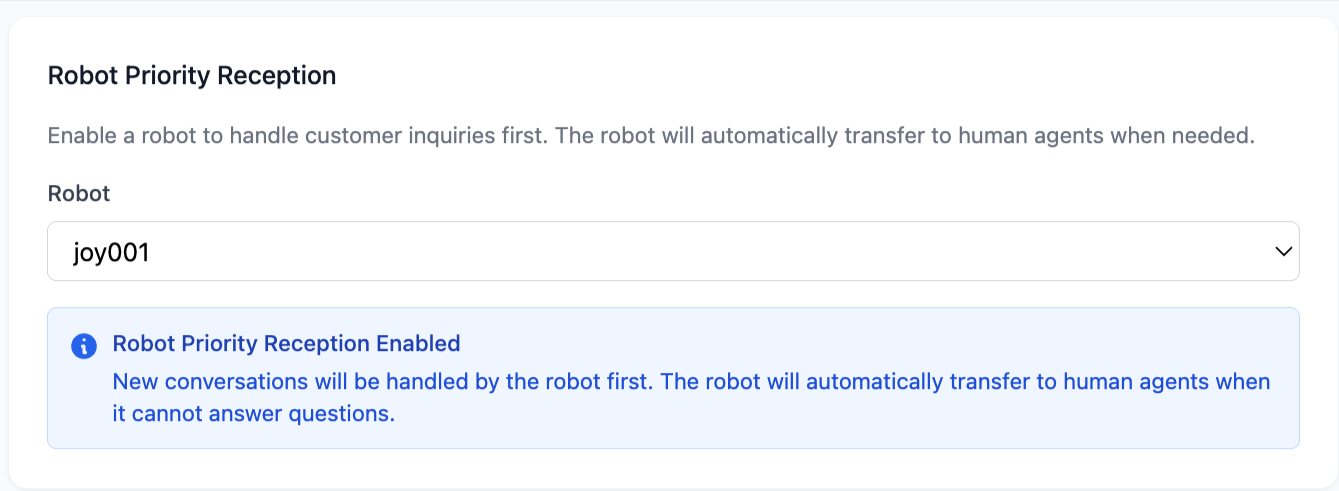
4.Enable Smart Bot Reception:
Bot Priority Reception: When this feature is enabled, all conversations on this channel will be handled by the smart bot first. When the bot cannot answer a visitor's question, it will automatically transfer to a human agent. If you need to add or configure a bot, please go to the "Settings - Bot" section.
Customize Chat Window
On the chat link settings page, click "Go to Settings" under "Custom Chat Window" to navigate to the chat window settings page.

1。Set Theme Color: Click the color swatch below "Theme Color" to open the color picker. Select an appropriate color and confirm, then you can see the color change in the preview panel on the right.
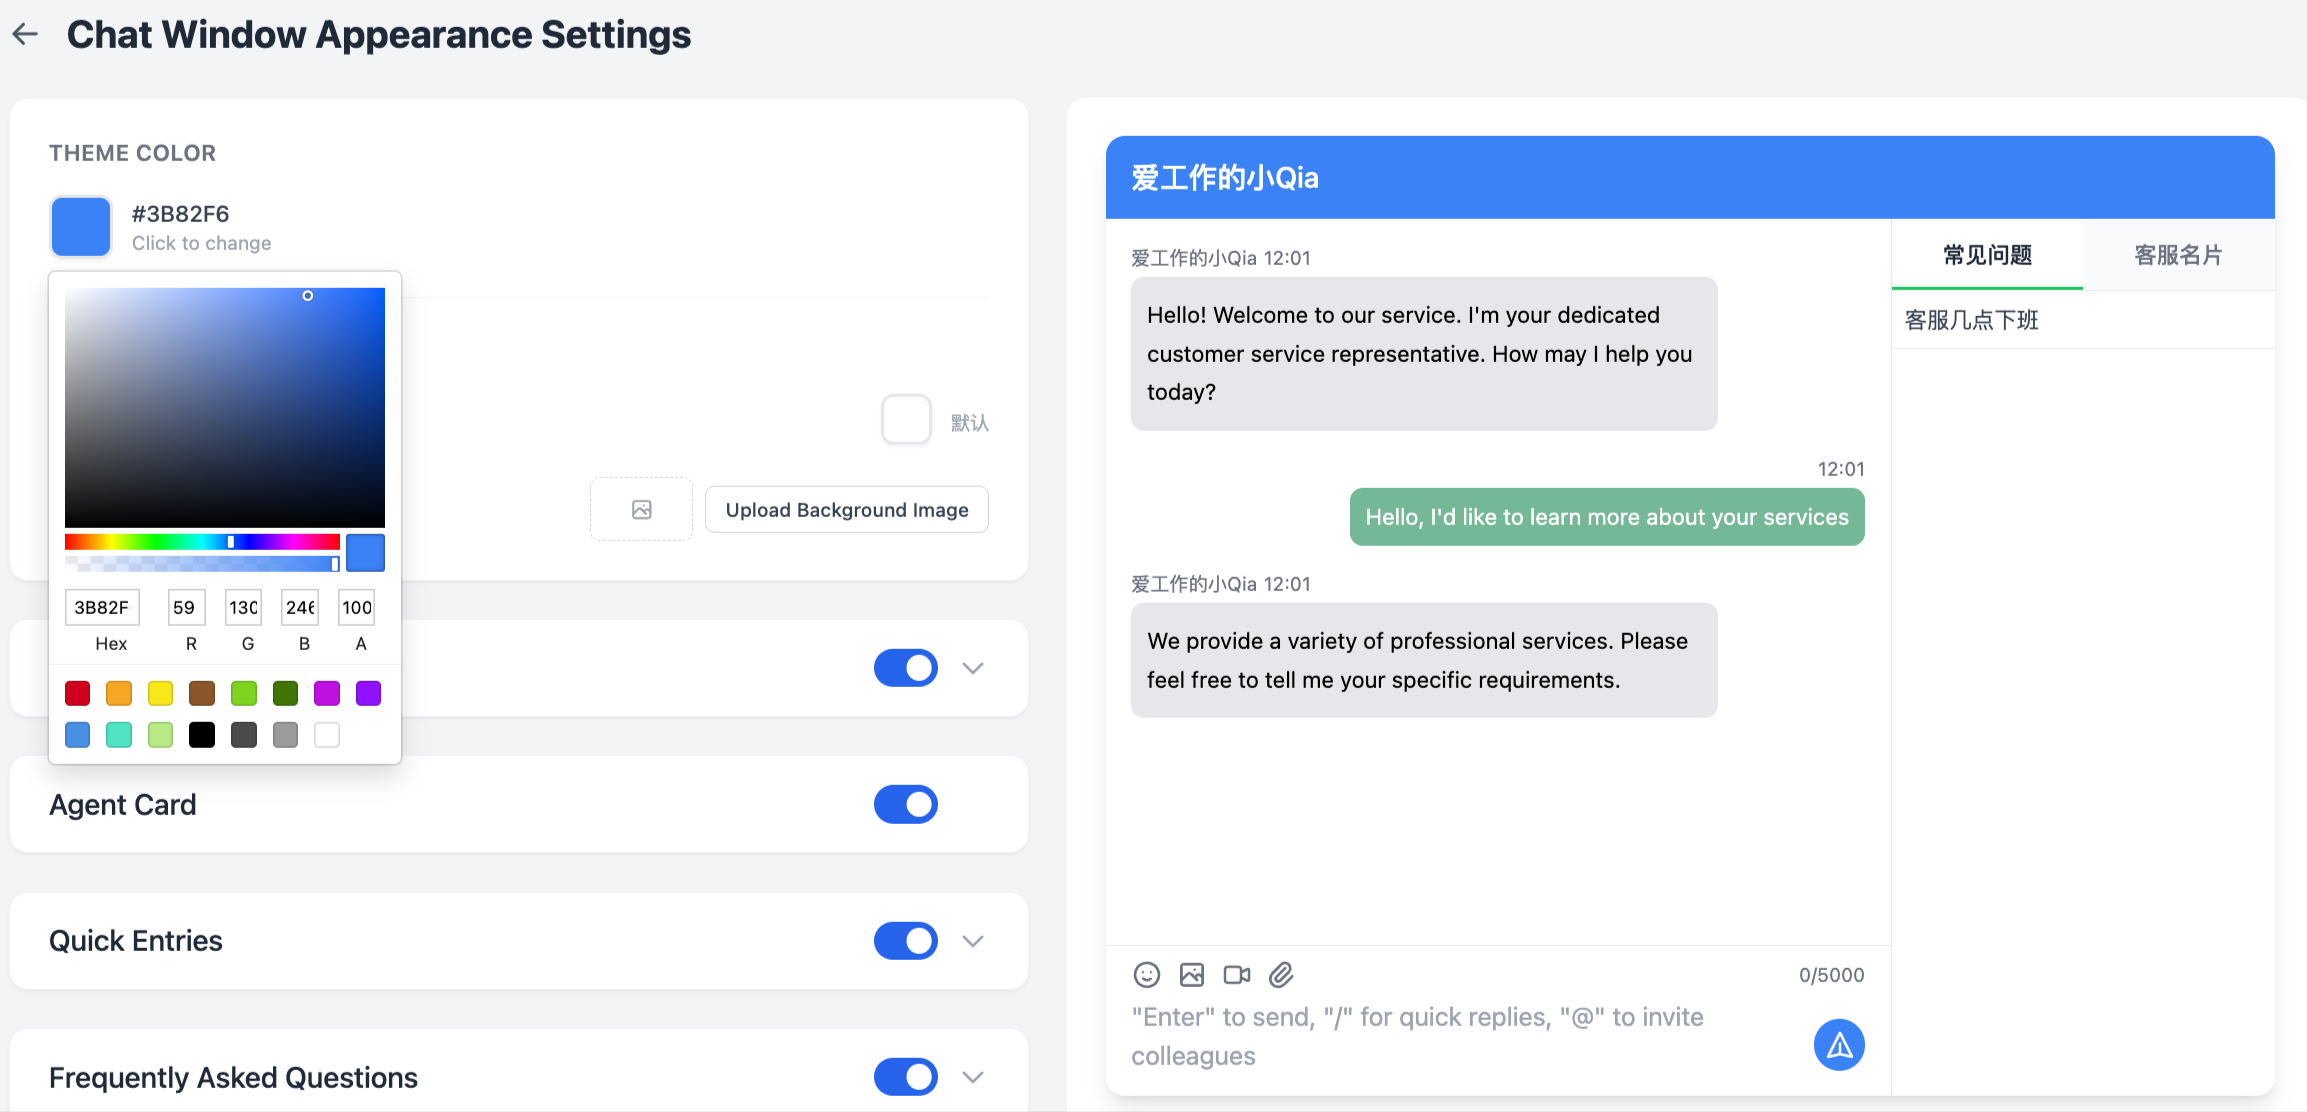
It is recommended to first set a color close to your brand's primary color. Other advanced options can be adjusted later.
2.Set Marquee Banner: You can add the text content you want to display in the marquee banner. You can also select text color and background color.
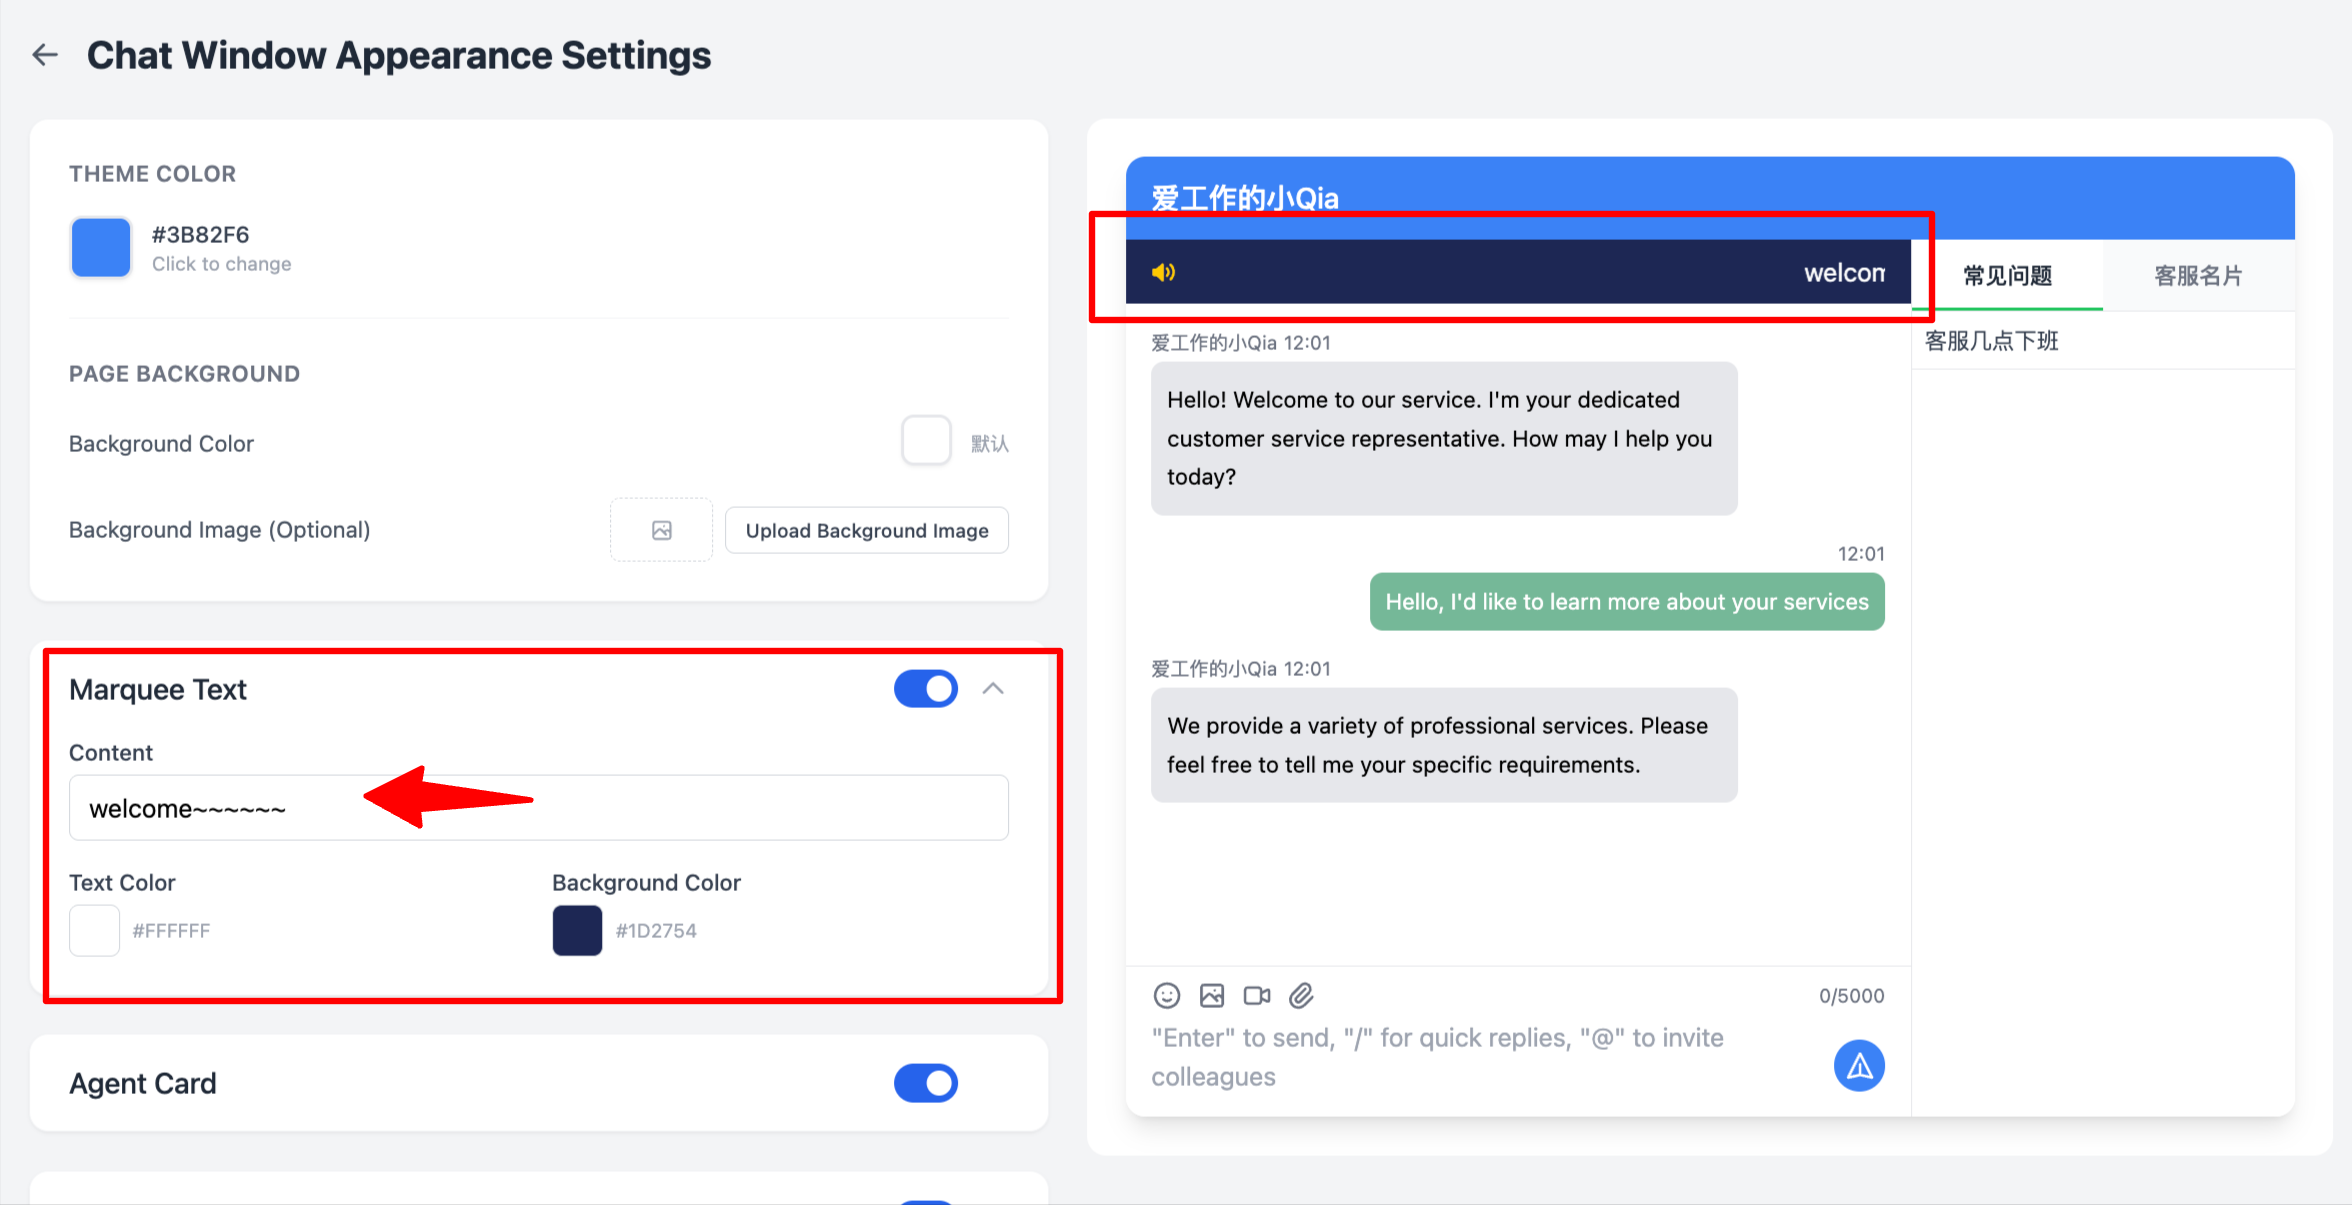
It is recommended to write "Service Hours / Promotional Information" on the first screen. Avoid writing too long as it affects readability.
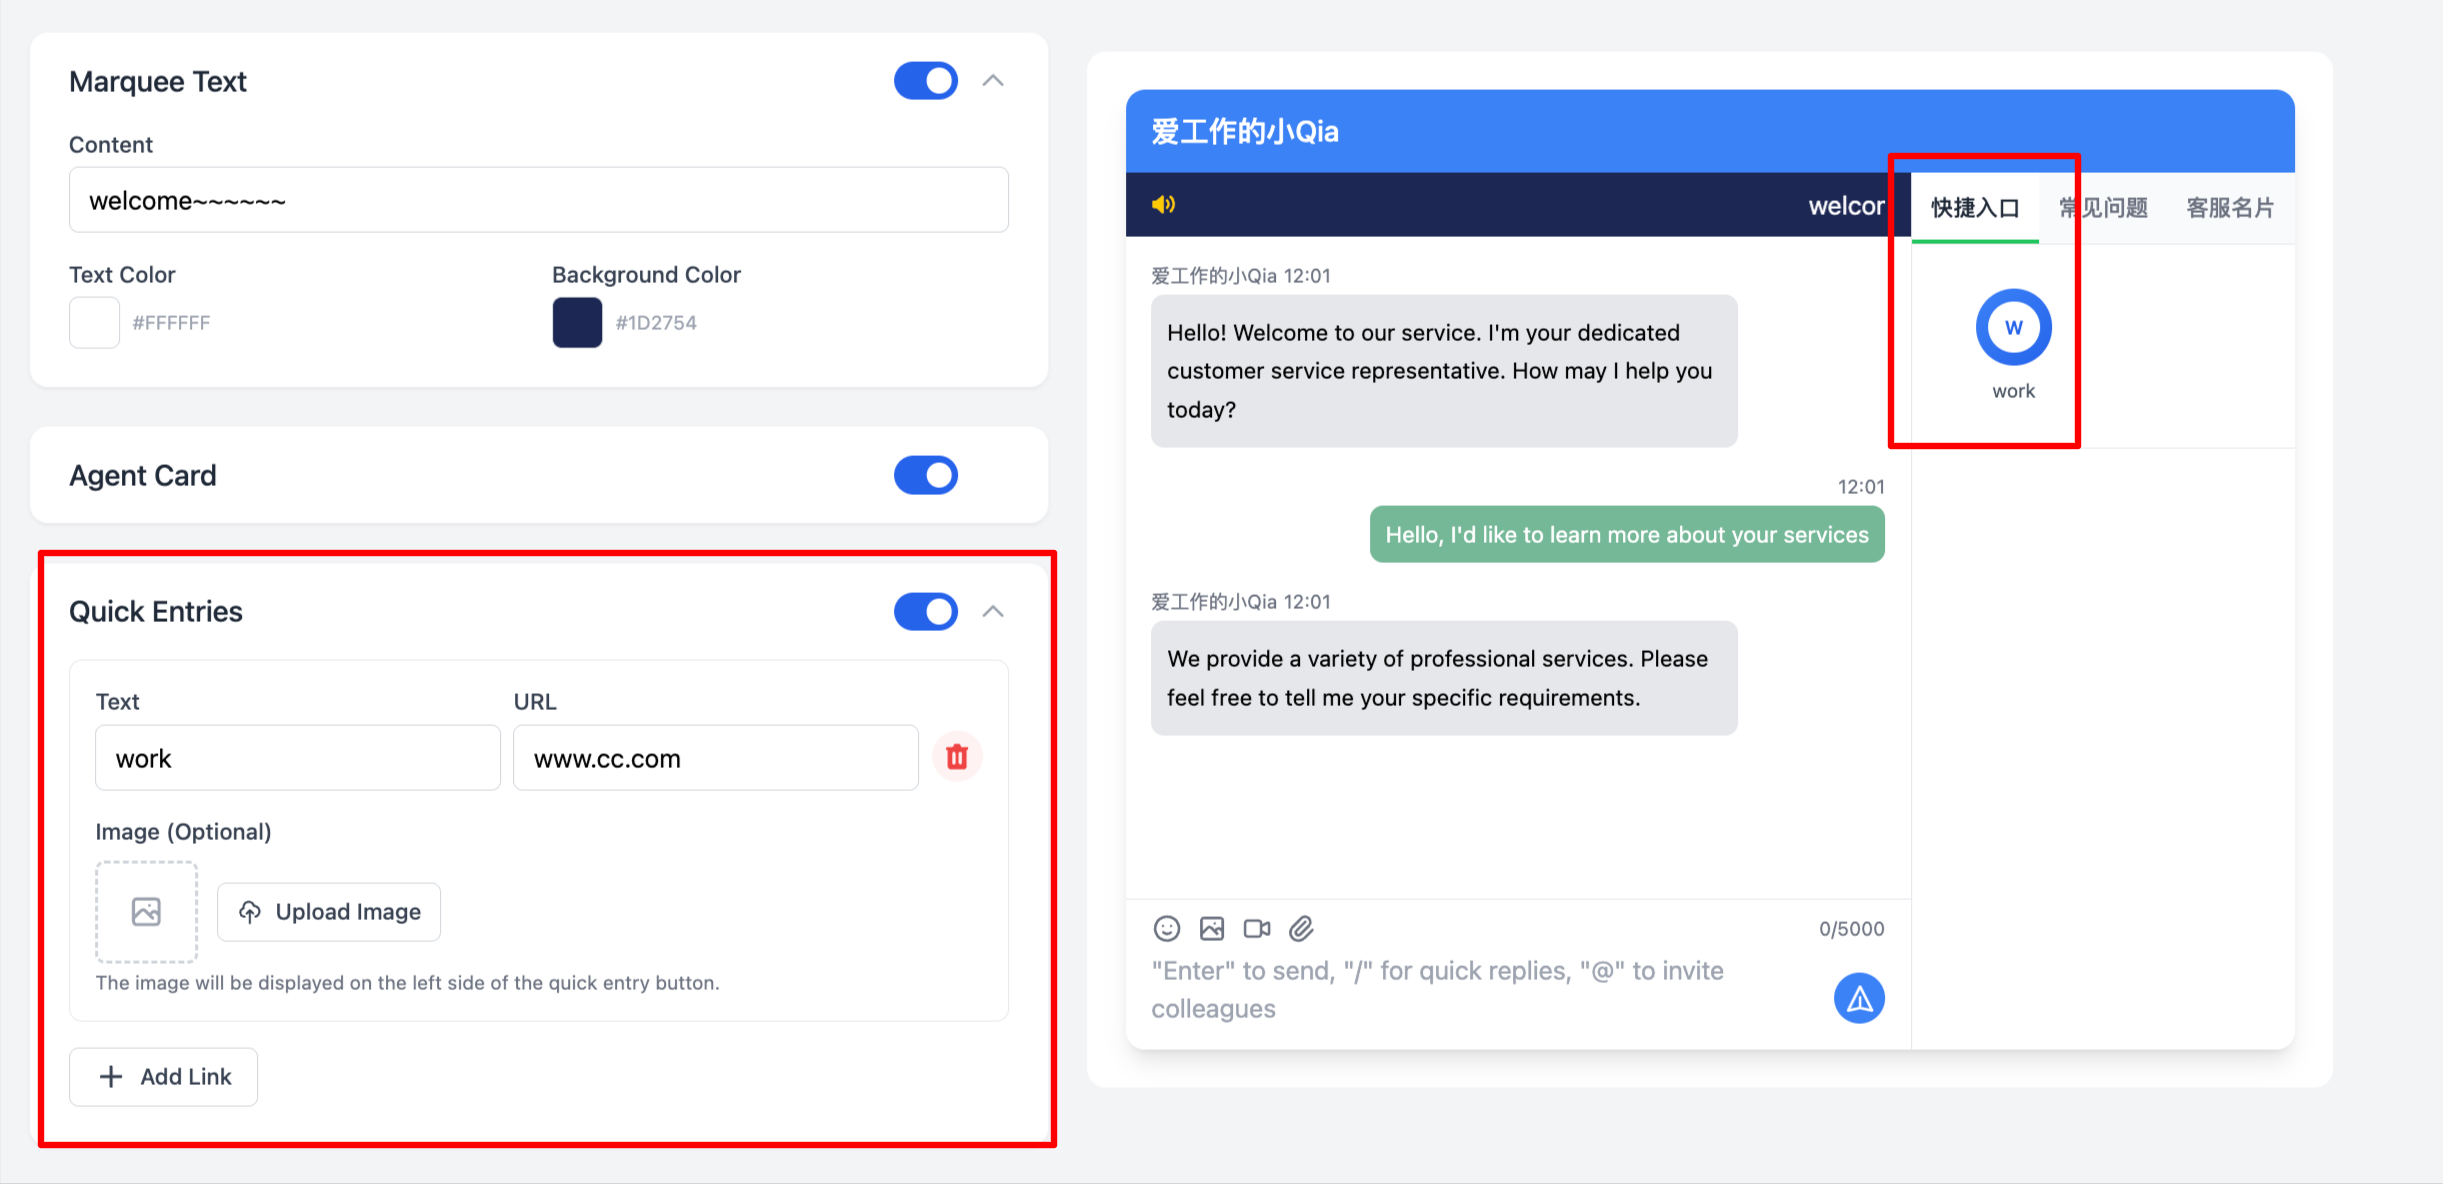
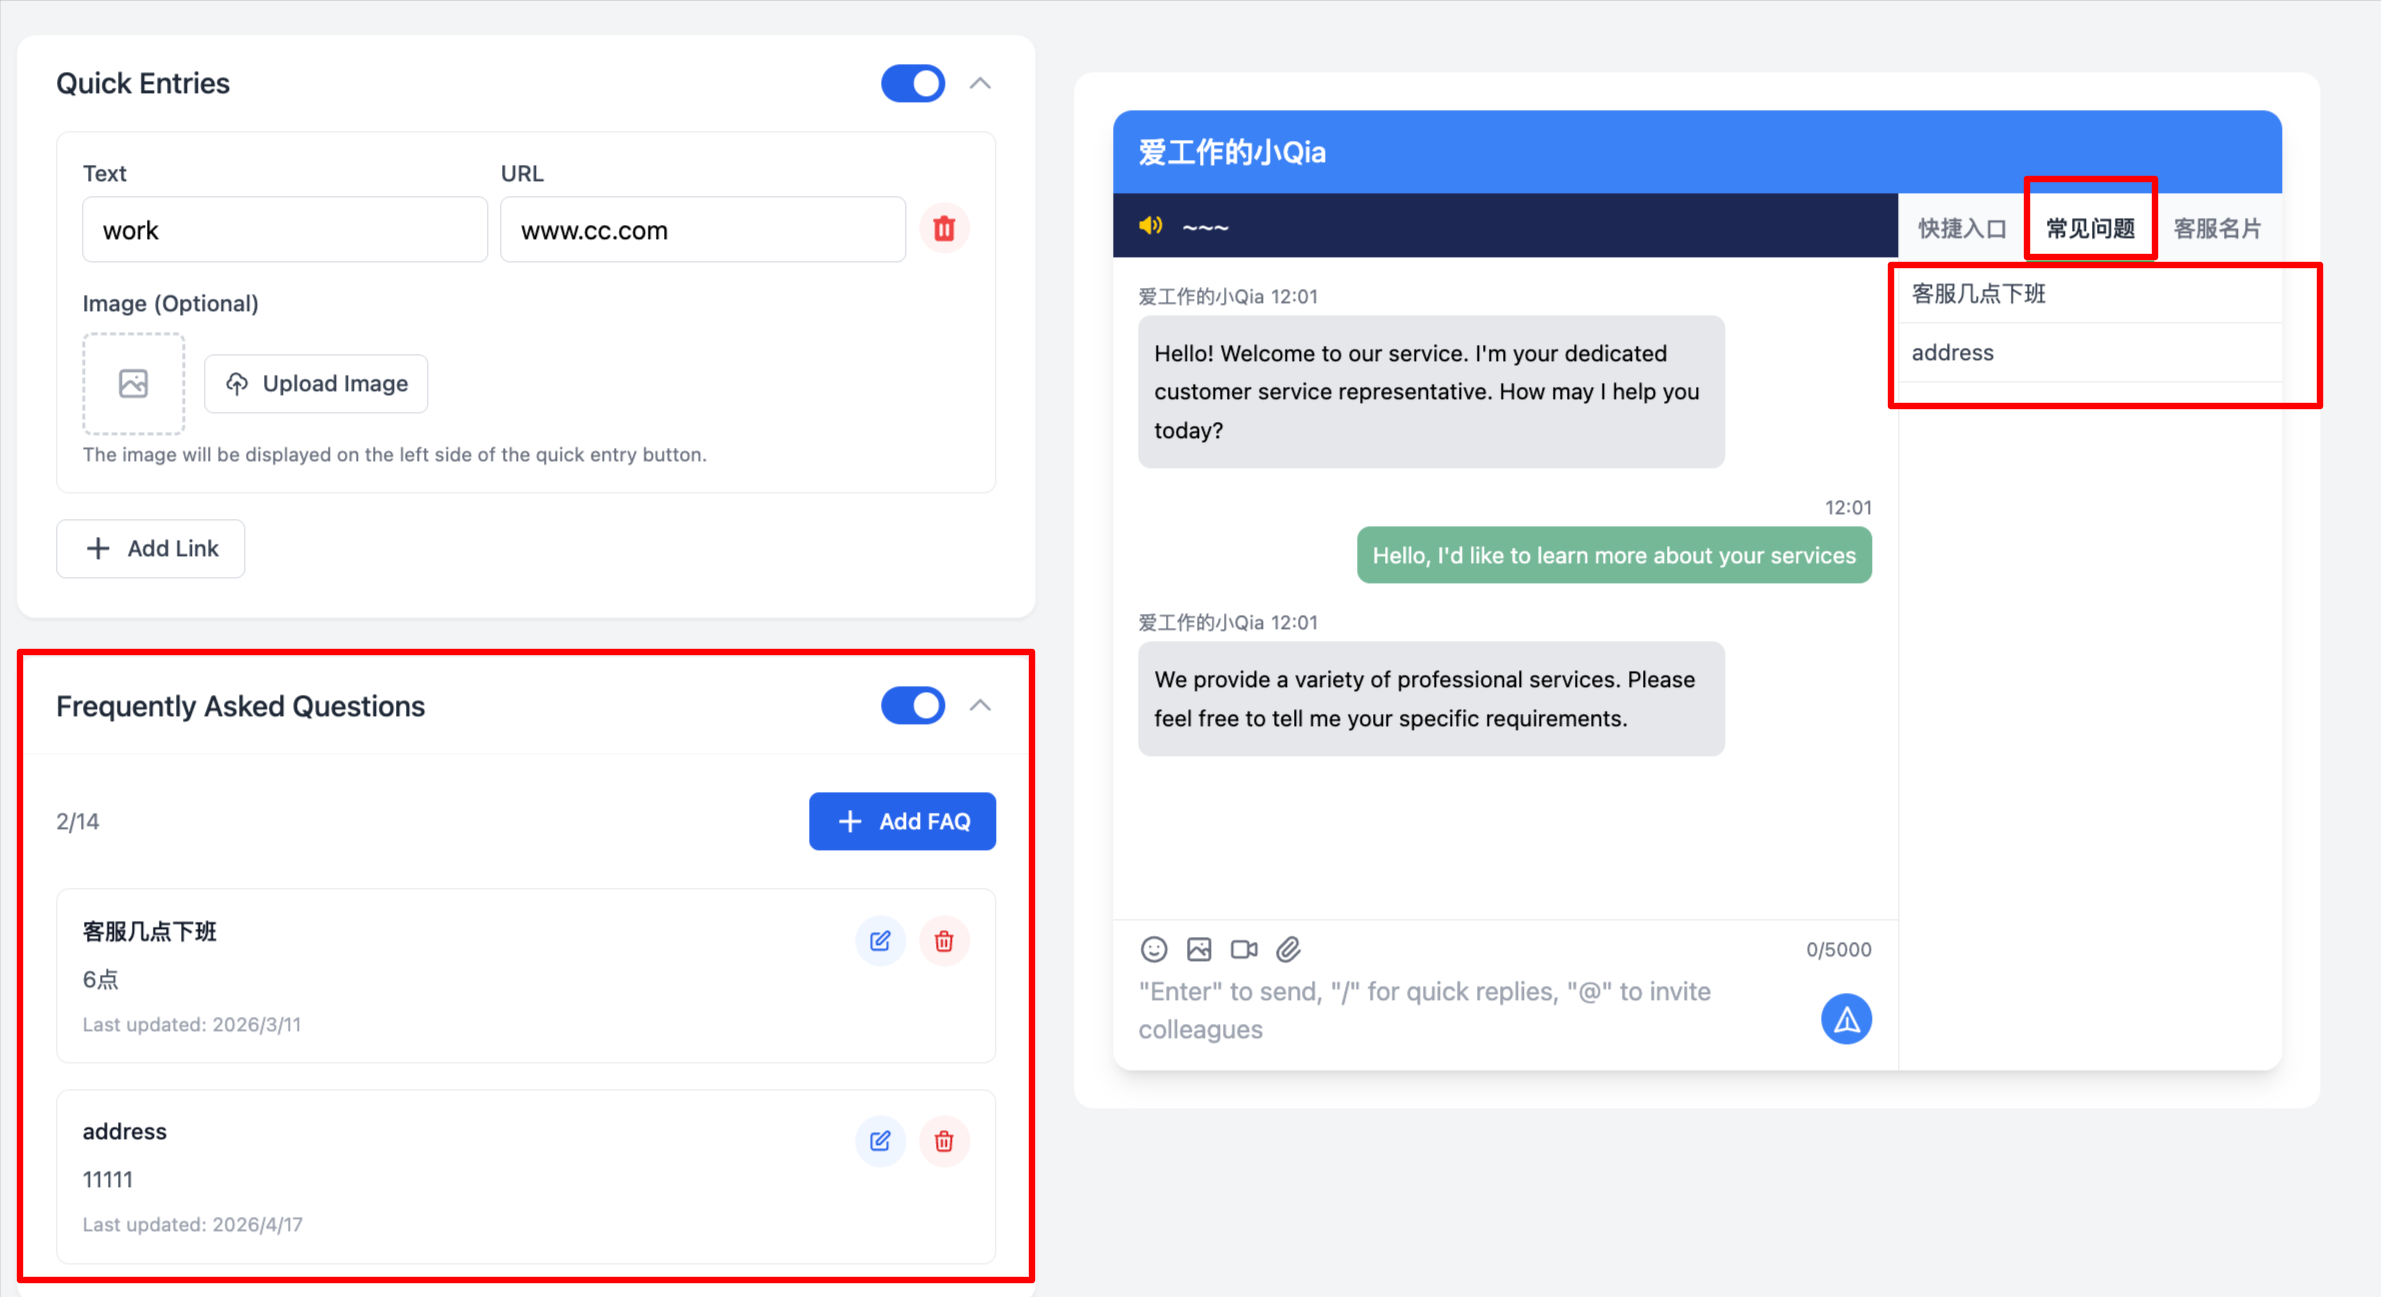
3.Set Quick Access Shortcuts: When this feature is enabled, visitors can click directly on the chat page to navigate to a linked page.
4.Set "FAQ": When this feature is enabled, visitors can directly click on a "Question" to receive a pre-configured reply, saving agent time and improving efficiency.
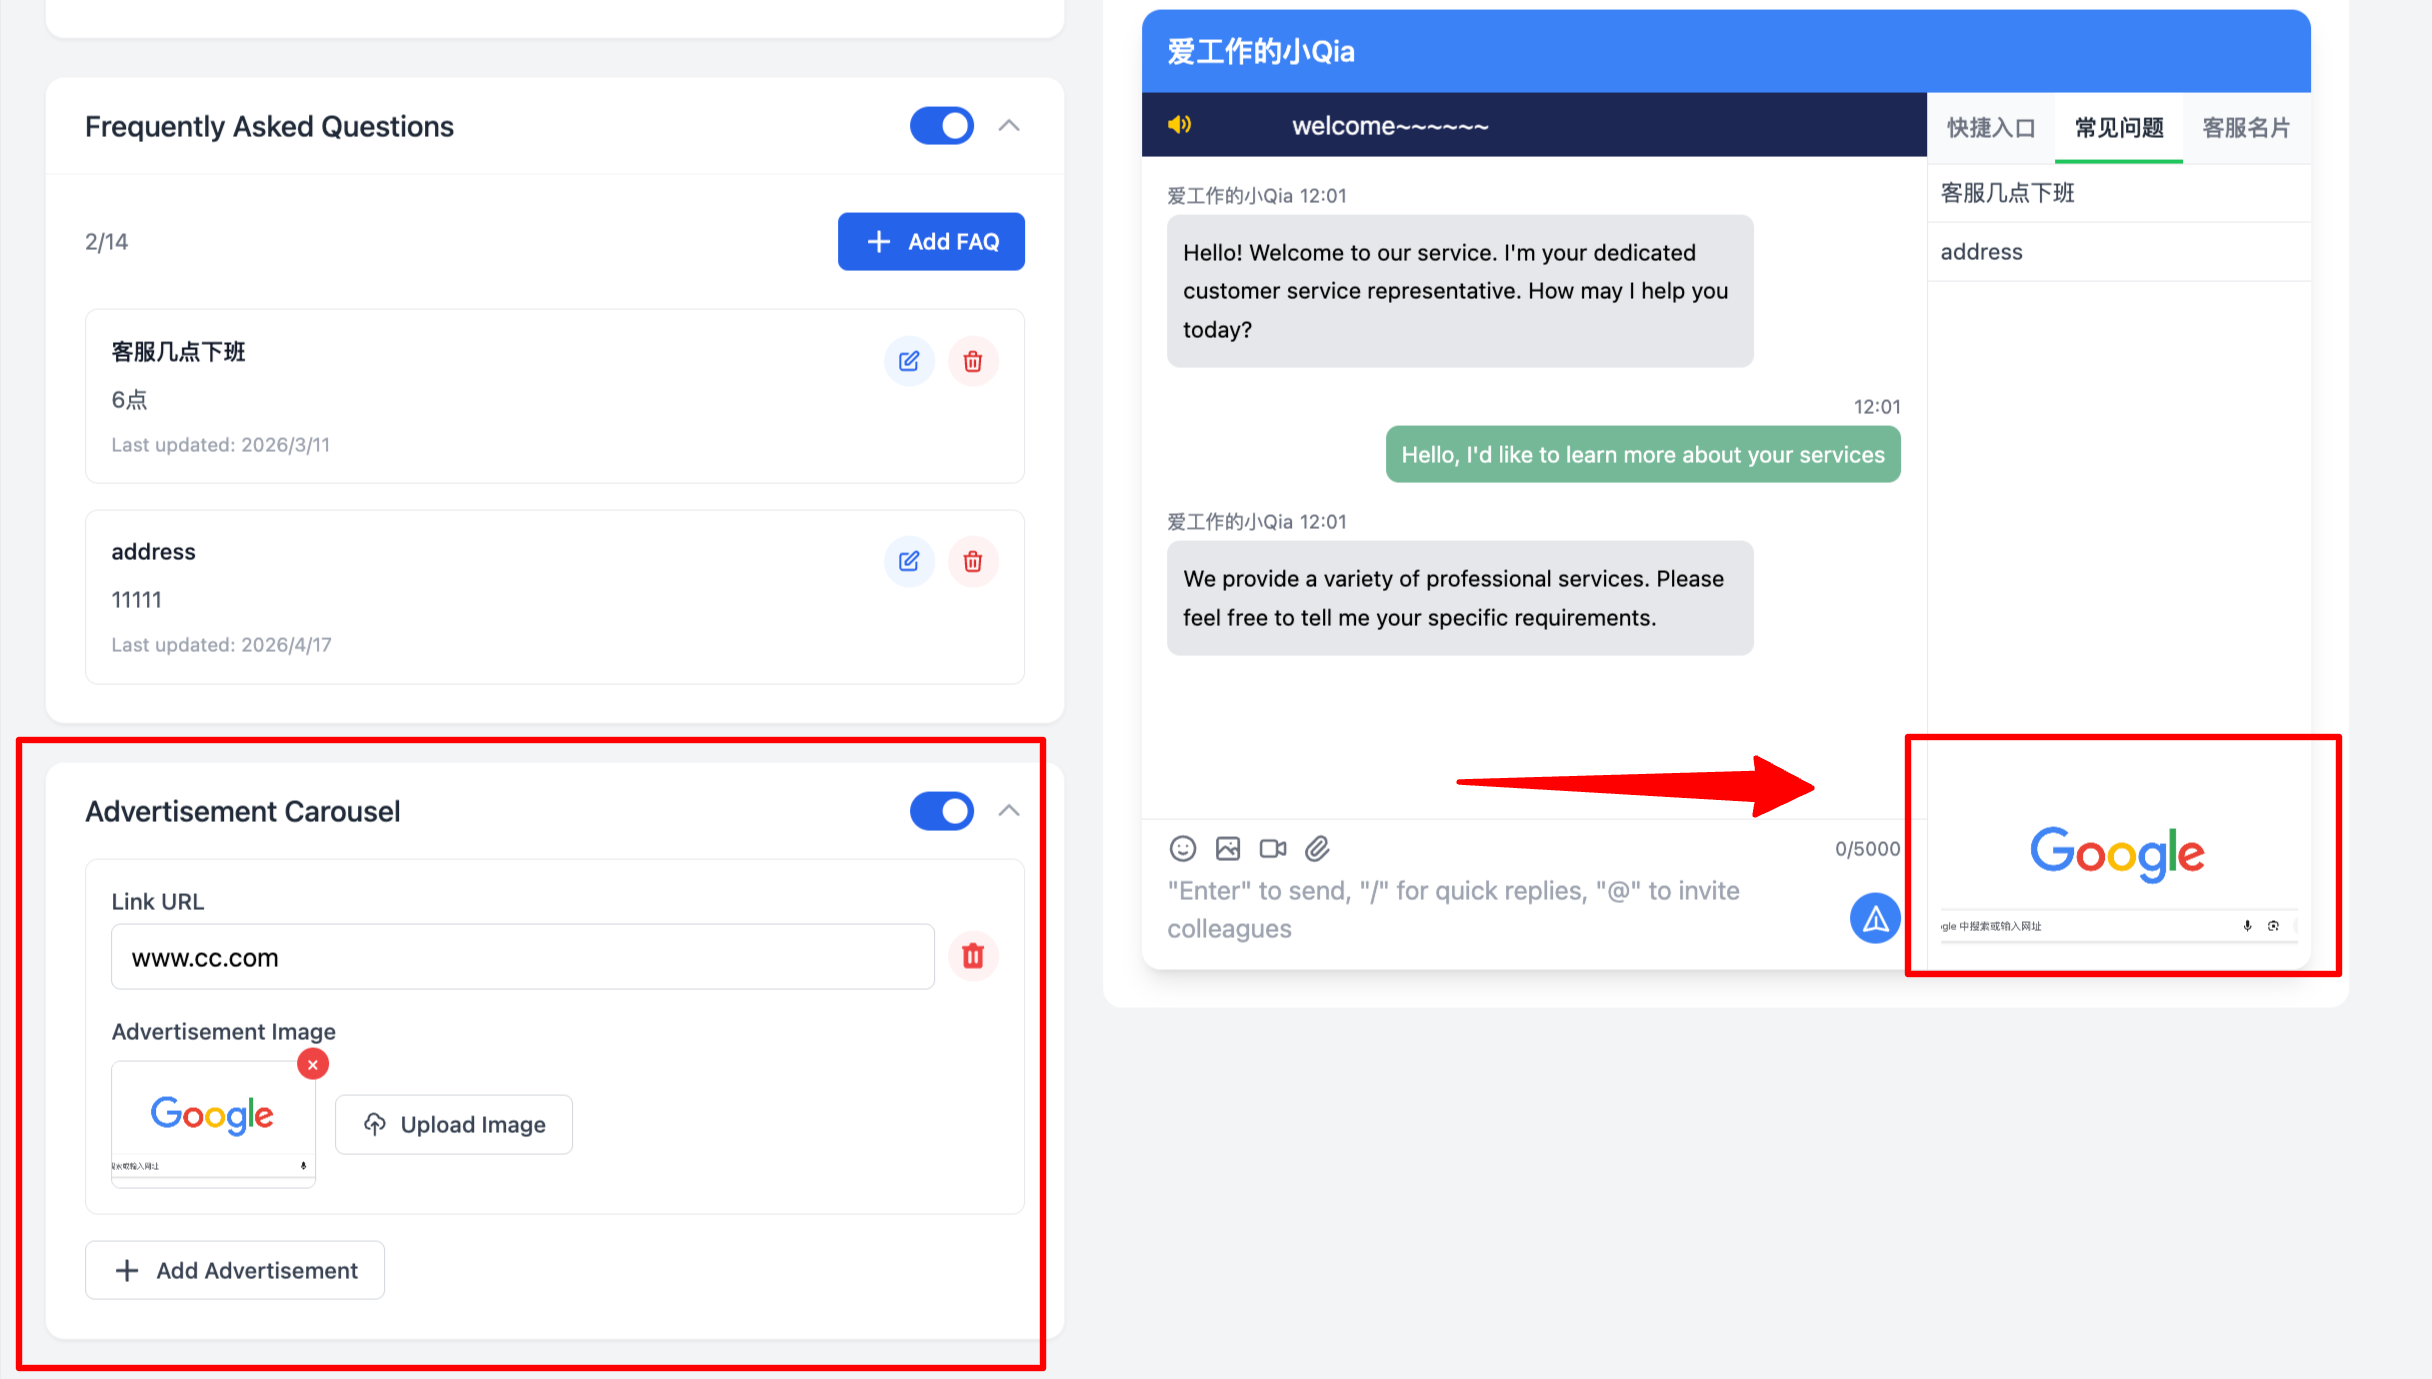
5。Set "Ad Carousel" - You can use this feature for marketing campaigns. Create promotional images that visitors can click to navigate to target pages. Multiple ad carousels can be configured.
Congratulations! You have completed the "Chat Link Settings" tutorial!
We believe you can build a reliable and unique chat link on your own.